Grinch Cake Pops
This post may contain affiliate links
The holidays are upon us, and with that comes the joy of creating delightful treats that bring smiles to faces young and old. One of my all-time favorites to whip up during this festive season is Grinch Cake Pops. These charming little bites encapsulate the spirit of holiday cheer, plus they are irresistibly cute and oh-so-delicious!
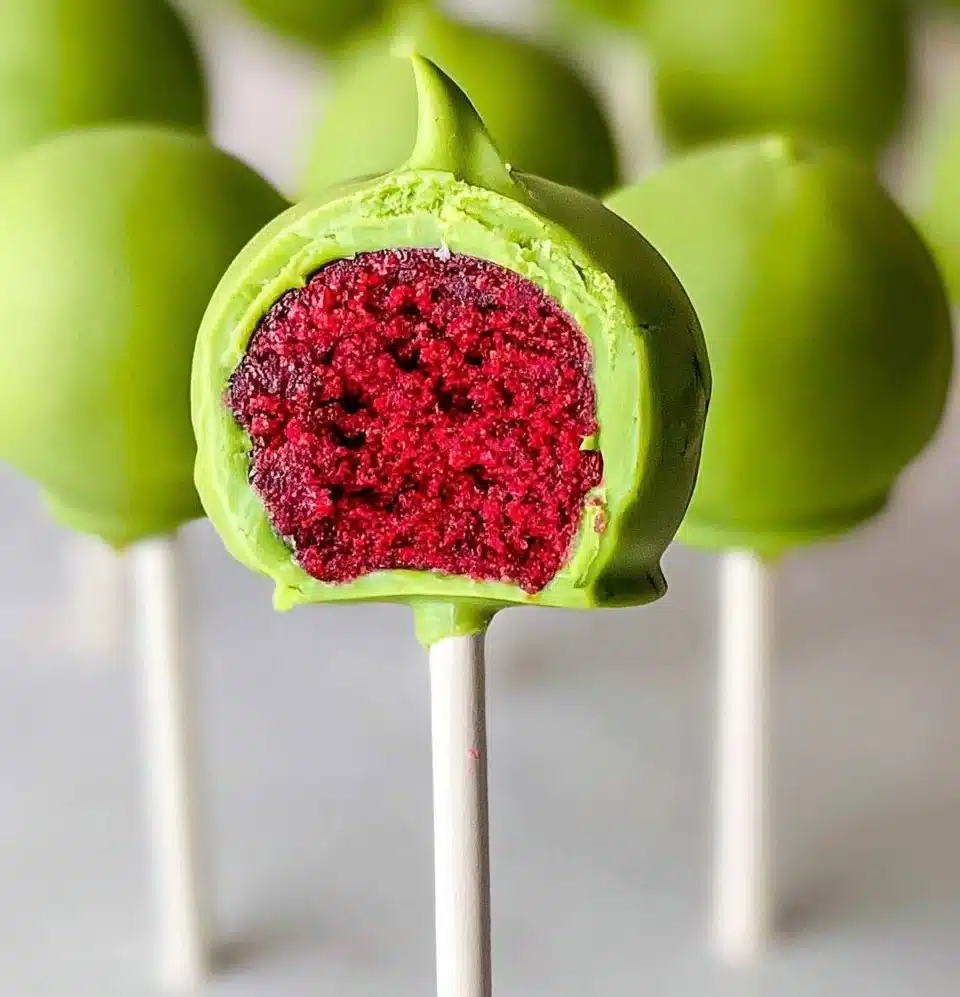
As I prepare to dive into making these festive treats, I can’t help but feel the warmth of the holiday season wrapping around me. The vibrant red velvet combined with the playful green candy melts create a feast for the eyes and the palate. Grinch Cake Pops light up any gathering with their whimsical spirit and delicious flavor, making them the perfect dessert for holiday parties or cozy nights at home.
What is Grinch Cake Pops?
Grinch Cake Pops are more than just a dessert; they are a festive celebration on a stick! Inspired by Dr. Seuss’s beloved character, the Grinch, these cake pops merge rich red velvet cake with sweet cream cheese frosting, all enveloped in a vibrant green candy coating. The unique flavor combination is enhanced with a playful twist, making them a favorite among families during the holiday season. With roots in both American baking traditions and playful holiday stories, these treats bring a slice of joy to every celebration.
Why You’ll Love This Grinch Cake Pops
- Delicious Flavor: The rich, moist texture of red velvet cake paired with creamy, sweet frosting creates a luxurious bite that’s hard to resist.
- Visual Appeal: The bright green coating and adorable red hearts make these cake pops a visual delight, perfect for impressing guests.
- Easy to Make: With simple ingredients and straightforward steps, even novice bakers can succeed in creating these festive pops.
- Fun for All Ages: Kids and adults alike love the playfulness of cake pops, making them a hit at any gathering.
Who It’s For
- Busy families looking for a fun dessert project
- Holiday party planners seeking a show-stopping treat
- Beginners eager to try their hand at cake pops
- Fans of festive and whimsical baking projects
Perfect Moments to Enjoy Grinch Cake Pops
- Holiday gatherings and Christmas parties
- Family movie nights with a classic holiday film
- School celebrations and bake sales
- Cozy winter evenings with loved ones
How to Make the Perfect Grinch Cake Pops
Creating these Grinch Cake Pops is a delightful adventure, combining the art of baking with the joy of decorating!
Ingredients
- 1 (15.25-ounce) box red velvet cake mix (plus the ingredients listed on the box)
- 4 ounces cream cheese, softened
- 1 1/2 cups powdered sugar
- Pinch salt
- 2 (12-ounce) packs light green candy melts (see note)
- 1 teaspoon vegetable shortening
- Cake pop sticks
- Red candy hearts
Step-by-Step Instructions
- Preheat the oven to 350°F.
- Make and bake the red velvet cake mix using the ingredients and instructions listed on the box. Let the cake cool completely before moving on.
- Beat the cream cheese, powdered sugar, and salt in a medium bowl until smooth and creamy.
- Crumble the cooled cake into fine crumbs in a separate bowl.
- Add the sweetened cream cheese a little at a time, mixing with a spatula after every addition.
- If the mixture is too dry to hold together, add more frosting, 1 tablespoon at a time, until the mixture reaches a moldable consistency.
- Portion the mix into 1 tablespoon-sized balls, roll until smooth, and arrange on a parchment-lined baking sheet.
- Freeze for 10 minutes or refrigerate for 30.
- Place the candy melts in a microwave-safe bowl.
- Melt them according to the package instructions or in 30-second intervals, stirring well between each spin.
- When fully melted, stir in 1 teaspoon of vegetable shortening for easier dipping.
- Remove the cake balls from the freezer and roll them again to remove any uneven spots.
- Dip the tip of a cake pop stick into the melted candy coating and insert it halfway into a chilled cake ball.
- Repeat with the remaining sticks and cake balls.
- Return the cake pops to the baking sheet and freeze for 10-15 minutes to secure the sticks.
- Transfer the melted candy to a tall glass or jar (reheat if needed).
- Carefully dip each cake pop into the glass until fully covered.
- Gently tap the stick against the side of the container to remove excess coating and place the cake pop upright in a styrofoam block or cake pop stand.
- Let the candy coating harden completely. Then, pipe stripes of green over the surface with the remaining candy coating (optional).
- Alternatively, press a red candy heart onto each cake pop while the coating is still wet. Enjoy!

For People with Diabetes: Sugar Substitutes
- Stevia: A natural sweetener with no calories.
- Monk Fruit: A great zero-calorie sweetener option.
- Allulose: A low-calorie sweetener that mimics sugar’s taste and texture.
- Avoid using honey or maple syrup as they can raise blood sugar levels.
Essential Tools for Grinch Cake Pops
- Baking sheet
- Parchment paper
- Microwave-safe bowl
- Spatula
- Tall glass or jar for dipping
- Styrofoam block or cake pop stand
Pro Tips to Elevate Your Grinch Cake Pops
- Chill the Cake Balls: Ensure your cake balls are well-chilled before dipping to help maintain their shape.
- Use Caution with Melting: Stir frequently while melting the candy melts to avoid overheating.
- Tap Off Excess Coating: Gently tap the cake pop against the container to ensure an even coat of candy.
Common Mistakes to Avoid
- Overmixing the Cake Batter: This can lead to dense cake pops. Mix just until combined!
- Skipping Chill Time: Not chilling the cake balls before dipping can lead to a mess.
- Neglecting the Shortening: Not adding shortening to the candy melts can result in a thicker coating that doesn’t coat well.
FAQs About Grinch Cake Pops
-
Can I use other flavors of cake mix?
Yes! Feel free to experiment with chocolate or vanilla for different flavor profiles. -
How long do they last?
It depends. They can be stored in an airtight container at room temperature for about 2-3 days.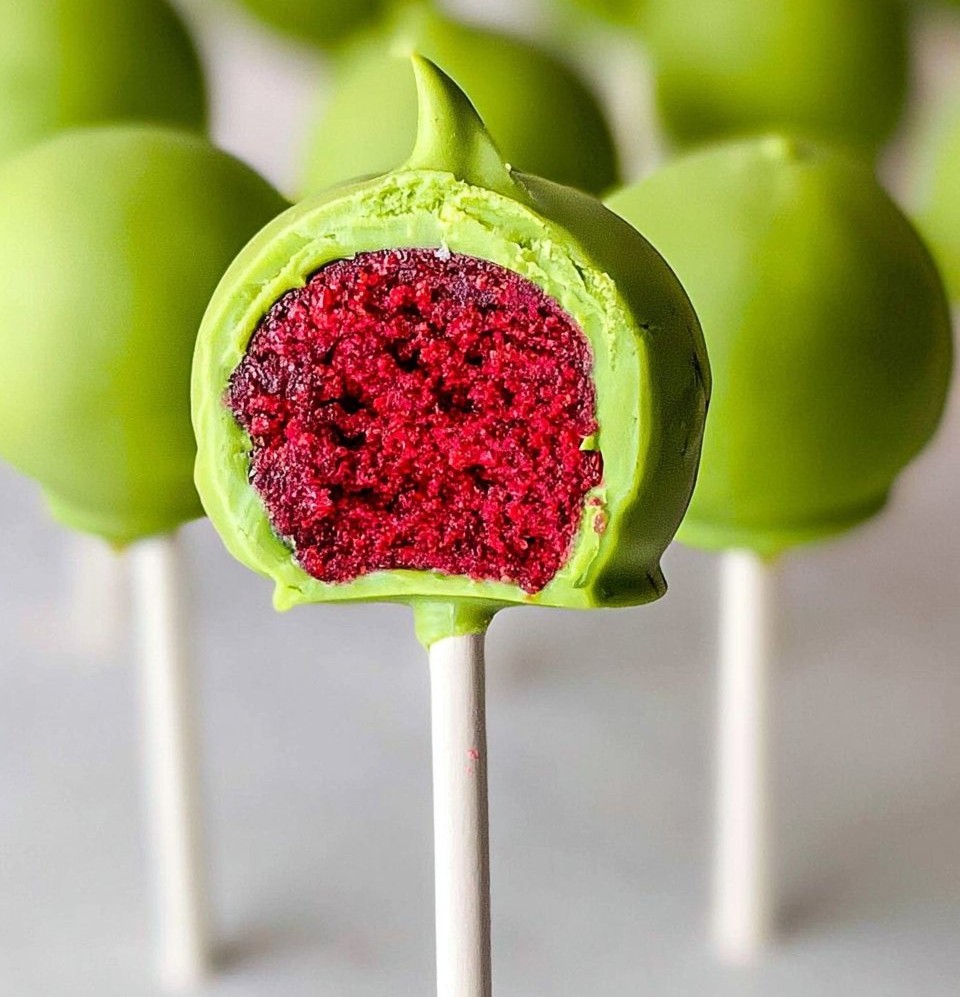
-
Can I make them ahead of time?
It depends. You can prepare the cake balls a few days in advance and dip them closer to your event. -
What if I don’t have cake pop sticks?
No worries! You can use plastic straws cut to size or simply opt to serve them as cake truffles. -
How can I customize the decorations?
Yes! Feel free to use any colored candy melts or sprinkles to match your theme or preference.
Wrapping Up: The Joy of Grinch Cake Pops
As the holiday season unfolds, let the joy of creating and sharing Grinch Cake Pops fill your home with warmth and cheer. Whether enjoyed at a festive gathering or during a quiet night in, these delightful treats remind us of the magic and sweetness that the season brings. I would love to hear about your experiences with Grinch Cake Pops, so don’t hesitate to share your thoughts below or tag me with your creations on social media!

Grinch Cake Pops
Delightful and visually appealing cake pops inspired by the Grinch, perfect for holiday festivities.
- Prep Time: 30 minutes
- Cook Time: 30 minutes
- Total Time: 60 minutes
- Yield: 24 servings 1x
- Category: Dessert
- Method: Baking
- Cuisine: American
- Diet: Vegetarian
Ingredients
- 1 (15.25-ounce) box red velvet cake mix (plus the ingredients listed on the box)
- 4 ounces cream cheese, softened
- 1 1/2 cups powdered sugar
- Pinch salt
- 2 (12-ounce) packs light green candy melts
- 1 teaspoon vegetable shortening
- Cake pop sticks
- Red candy hearts
Instructions
- Preheat the oven to 350°F.
- Make and bake the red velvet cake mix using the ingredients and instructions listed on the box. Let the cake cool completely before moving on.
- Beat the cream cheese, powdered sugar, and salt in a medium bowl until smooth and creamy.
- Crumble the cooled cake into fine crumbs in a separate bowl.
- Add the sweetened cream cheese a little at a time, mixing with a spatula after every addition.
- If the mixture is too dry to hold together, add more frosting, 1 tablespoon at a time, until the mixture reaches a moldable consistency.
- Portion the mix into 1 tablespoon-sized balls, roll until smooth, and arrange on a parchment-lined baking sheet.
- Freeze for 10 minutes or refrigerate for 30.
- Place the candy melts in a microwave-safe bowl.
- Melt them according to the package instructions or in 30-second intervals, stirring well between each spin.
- When fully melted, stir in 1 teaspoon of vegetable shortening for easier dipping.
- Remove the cake balls from the freezer and roll them again to remove any uneven spots.
- Dip the tip of a cake pop stick into the melted candy coating and insert it halfway into a chilled cake ball.
- Repeat with the remaining sticks and cake balls.
- Return the cake pops to the baking sheet and freeze for 10-15 minutes to secure the sticks.
- Transfer the melted candy to a tall glass or jar (reheat if needed).
- Carefully dip each cake pop into the glass until fully covered.
- Gently tap the stick against the side of the container to remove excess coating and place the cake pop upright in a styrofoam block or cake pop stand.
- Let the candy coating harden completely. Then, pipe stripes of green over the surface with the remaining candy coating (optional).
- Alternatively, press a red candy heart onto each cake pop while the coating is still wet. Enjoy!
Notes
These cake pops can be stored in an airtight container at room temperature for about 2-3 days.
Nutrition
- Serving Size: 1 pop
- Calories: 160
- Sugar: 18g
- Sodium: 200mg
- Fat: 7g
- Saturated Fat: 4g
- Unsaturated Fat: 3g
- Trans Fat: 0g
- Carbohydrates: 24g
- Fiber: 0g
- Protein: 2g
- Cholesterol: 15mg