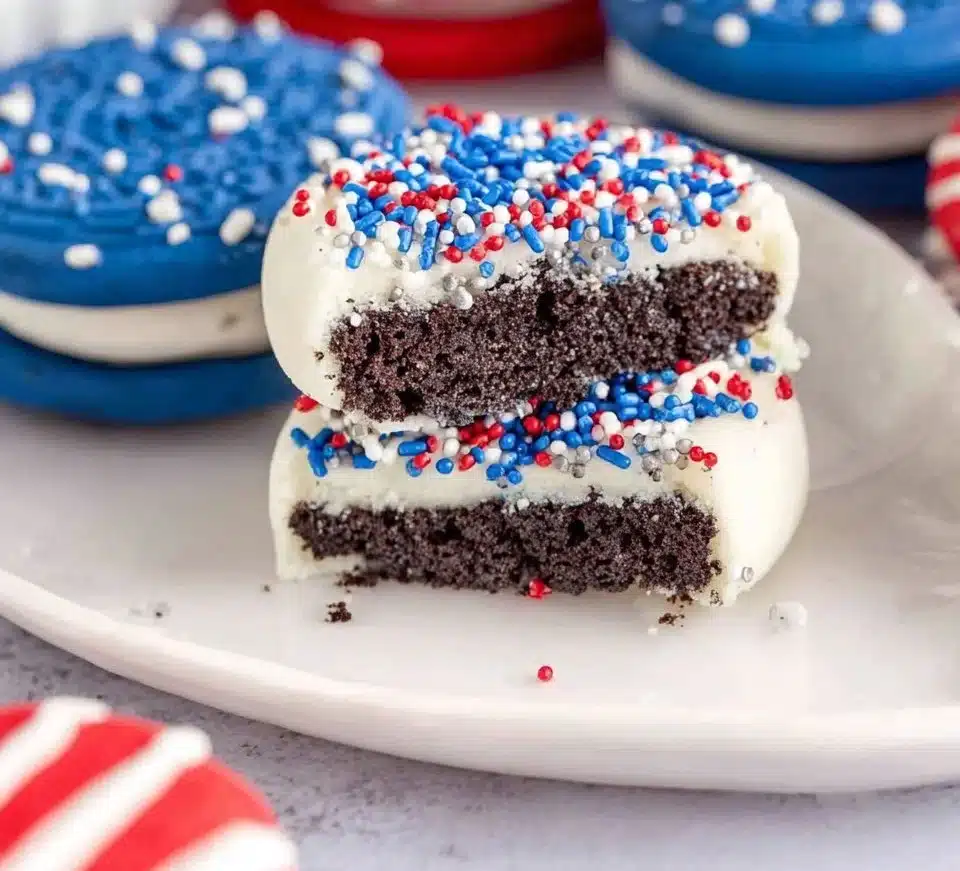
Covered Oreo
This post may contain affiliate links
There’s something extraordinarily comforting about the rich, chocolaty crunch of an Oreo cookie. Each time I bite into one, I’m whisked back to my childhood. The nostalgia hits me—the quick afternoon snack after school or the late-night indulgence paired with a glass of cold milk. This iconic treat deserves to be celebrated and transformed, which is exactly why I’m so excited to share my recipe for Covered Oreo. Fancy yet playful, these delightful bites are sure to satisfy any sweet tooth!
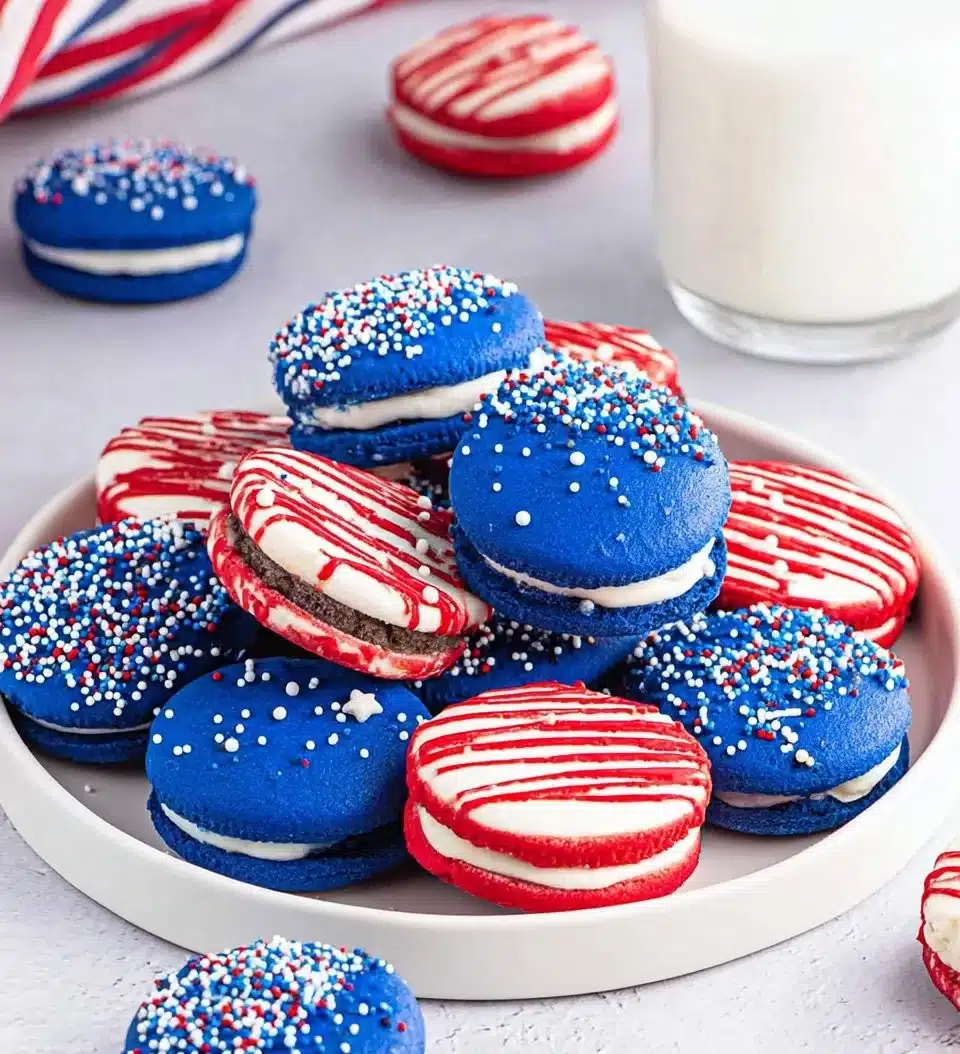
Covered Oreo stands out as a perfect treat not just for everyday enjoyment, but for festive occasions too. The combination of crunchy Oreos, creamy filling, and a luscious chocolate coating creates a kaleidoscope of flavors and textures. With layers of rich flavor and colorful sprinkles, these treats are as memorable as the moments they’re meant to celebrate.
Exploring the Roots of Covered Oreo
At its core, Covered Oreo is a fun and easy-to-make treat that epitomizes the joy of simple desserts. This charming creation draws inspiration from American snack culture, marrying the beloved Oreo cookie with chocolate and cream. If you’re anything like me, you probably have cherished memories of Oreos being a staple at family gatherings, birthday parties, or just as a personal snack. Covered Oreo is a delightful reinvention, making it a conversation starter and a centerpiece for any dessert table.
This treat brings a touch of elegance while still reminding us of the playful simplicity we all adore. As you dive into the creamy, chocolaty goodness, you may just find yourself reminiscing about carefree childhood days spent indulging in sweets.
Why You’ll Love This Covered Oreo
- Irresistible Flavor: The combination of chocolate, cream cheese, and crunchy Oreos creates a perfect balance of sweet and satisfying.
- Easy to Make: With just a few ingredients and straightforward instructions, even novice bakers can pull this off!
- Visually Stunning: Drizzled with bright, festive chocolate and adorned with sprinkles, these treats make for an eye-catching addition to any dessert spread.
- Delight for All Ages: Whether you’re hosting a party or looking for a family activity, these Covered Oreos will please kids and adults alike.
Who Will Enjoy This Covered Oreo Most
- Busy Families: Quick to prepare, these are a perfect guilt-free indulgence for anyone on the go.
- Celebratory Hosts: Ideal for parties and holidays, bringing colorful joy to any dessert table.
- Food Lovers: If you enjoy getting creative in the kitchen, this recipe allows for flavor variations and personal touches.
- Home Bakers: Perfect for those who want to impress with minimal effort but maximum impact.
Perfect Moments to Enjoy Covered Oreo
- Celebratory Events: Birthdays, holidays, and family gatherings are ideal for showing off your Covered Oreo skills.
- Cozy Nights In: Pair them with a cup of hot cocoa or coffee for a delightful evening treat.
- Potlucks and BBQs: Easy to transport and a definite crowd-pleaser.
- Weeknight Treats: They are a simple way to brighten up any dinner with a sweet ending.
How to Make the Perfect Covered Oreo
Creating the perfect Covered Oreo is a rewarding experience. It all begins with high-quality ingredients and a bit of love in the kitchen.
Ingredients
- 2 packages Oreo cookies
- 1 cup cream cheese, softened
- 1 cup red melting chocolate
- 1 cup blue melting chocolate
- Sprinkles (red, white, and blue)
Step-by-Step Instructions
- Crush the Oreo cookies into fine crumbs using a food processor or by placing them in a ziplock bag and rolling with a rolling pin.
- Combine the crushed Oreos with softened cream cheese in a mixing bowl. Blend until well combined, forming a thick dough.
- Roll the mixture into small balls, about 1 inch in diameter, and place them on a baking sheet lined with parchment paper.
- Chill the Oreo balls in the refrigerator for about 30 minutes until firm.
- Melt the red melting chocolate according to the package instructions. Dip each Oreo ball into the melted chocolate until fully coated.
- Place the coated Oreos back on the parchment-lined baking sheet.
- Sprinkle red, white, and blue sprinkles on top while the chocolate is still wet.
- Melt the blue melting chocolate and repeat the process, this time drizzling it on top of the already coated Oreos.
- Chill again in the refrigerator for another 30 minutes to allow the chocolate to set completely.
For People with Diabetes: Sugar Substitutes
If you need to make this dessert friendlier for those watching their sugar, consider using sugar substitutes like stevia, monk fruit, or allulose. Avoid honey or maple syrup, as these can cause spikes in blood sugar.
Essential Tools for Covered Oreo
- Food processor or rolling pin
- Ziplock bags (for crushing Oreos)
- Mixing bowl
- Baking sheet
- Parchment paper
Chef-Approved Tips for Success
- Use Fresh Ingredients: Make sure your cream cheese is fresh and at room temperature for easier blending.
- Chill Properly: Chilling the Oreo balls is crucial for maintaining their shape when dipped in chocolate.
- Experiment with Flavors: Feel free to add flavors like peppermint extract or almond extract for a unique twist.
- Get Creative with Toppings: Besides sprinkles, try crushed nuts or drizzle with white chocolate for a different touch.
Storing and Reheating Tips
- Refrigerate: Store your Covered Oreos in an airtight container in the fridge for up to a week.
- Freeze: They can also be frozen for up to a month. Just make sure to keep them in an airtight container to avoid freezer burn.
- No Reheating Needed: Enjoy them cold; they taste best straight from the fridge!
Common Mistakes to Avoid
- Not Chilling Long Enough: Skipping the chilling step can cause the balls to fall apart during dipping.
- Too Much Cream Cheese: Adding too much cream cheese can make the mixture too soft and difficult to shape.
- Skipping the Sprinkles: Don’t forget the fun! Sprinkles not only add color but also a little crunch to each bite.
Frequently Asked Questions: Covered Oreo
-
Can I use different flavored Oreos?
Yes, using flavored Oreos like mint or peanut butter can add a fun twist! -
Is this recipe gluten-free?
No, as traditional Oreos contain gluten. However, you can substitute with gluten-free cookies. -
How long will these last?
Yes, they can last up to a week in the fridge if stored properly in an airtight container. -
Can I make these dairy-free?
It depends; you would need to substitute cream cheese with a dairy-free option and use dairy-free chocolate. -
Can I decorate them differently?
Yes, feel free to get creative! Use different chocolate colors and toppings to suit your festive occasion.
Final Thoughts on Covered Oreo
I absolutely love making Covered Oreo, not just for the joy it brings to the table but for the memories created around it. This recipe provides a wonderful opportunity to gather friends and family while indulging in something sweet and special. I invite you to bring this treat into your home, share your stories, and enjoy every delicious bite. Don’t forget to leave a comment and share your experiences with this delightful recipe!

Covered Oreo
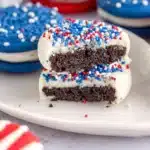
Covered Oreos are a delightful reinvention of the classic cookie, featuring crunchy Oreos mixed with creamy filling and coated in colorful chocolate.
- Prep Time: 15 minutes
- Cook Time: 30 minutes
- Total Time: 45 minutes
- Yield: 24 servings 1x
- Category: Dessert
- Method: No-bake
- Cuisine: American
- Diet: Vegetarian
Ingredients
- 2 packages Oreo cookies
- 1 cup cream cheese, softened
- 1 cup red melting chocolate
- 1 cup blue melting chocolate
- Sprinkles (red, white, and blue)
Instructions
- Crush the Oreo cookies into fine crumbs using a food processor or by placing them in a ziplock bag and rolling with a rolling pin.
- Combine the crushed Oreos with softened cream cheese in a mixing bowl. Blend until well combined, forming a thick dough.
- Roll the mixture into small balls, about 1 inch in diameter, and place them on a baking sheet lined with parchment paper.
- Chill the Oreo balls in the refrigerator for about 30 minutes until firm.
- Melt the red melting chocolate according to the package instructions. Dip each Oreo ball into the melted chocolate until fully coated.
- Place the coated Oreos back on the parchment-lined baking sheet.
- Sprinkle red, white, and blue sprinkles on top while the chocolate is still wet.
- Melt the blue melting chocolate and repeat the process, this time drizzling it on top of the already coated Oreos.
- Chill again in the refrigerator for another 30 minutes to allow the chocolate to set completely.
Notes
For a healthier alternative, consider using sugar substitutes for the cream cheese mixture.
Nutrition
- Serving Size: 1 ball
- Calories: 120
- Sugar: 10g
- Sodium: 60mg
- Fat: 7g
- Saturated Fat: 4g
- Unsaturated Fat: 3g
- Trans Fat: 0g
- Carbohydrates: 14g
- Fiber: 0g
- Protein: 1g
- Cholesterol: 5mg