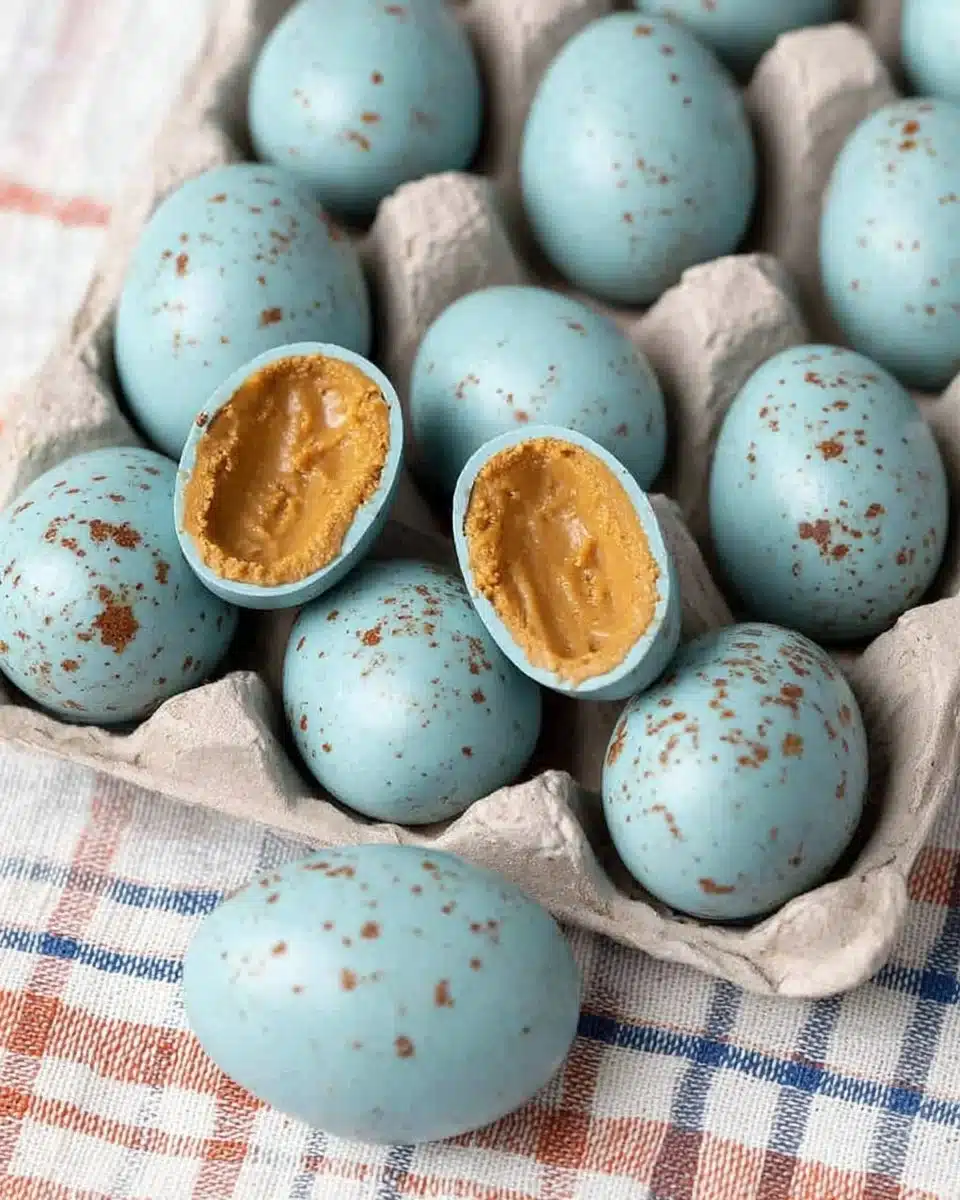
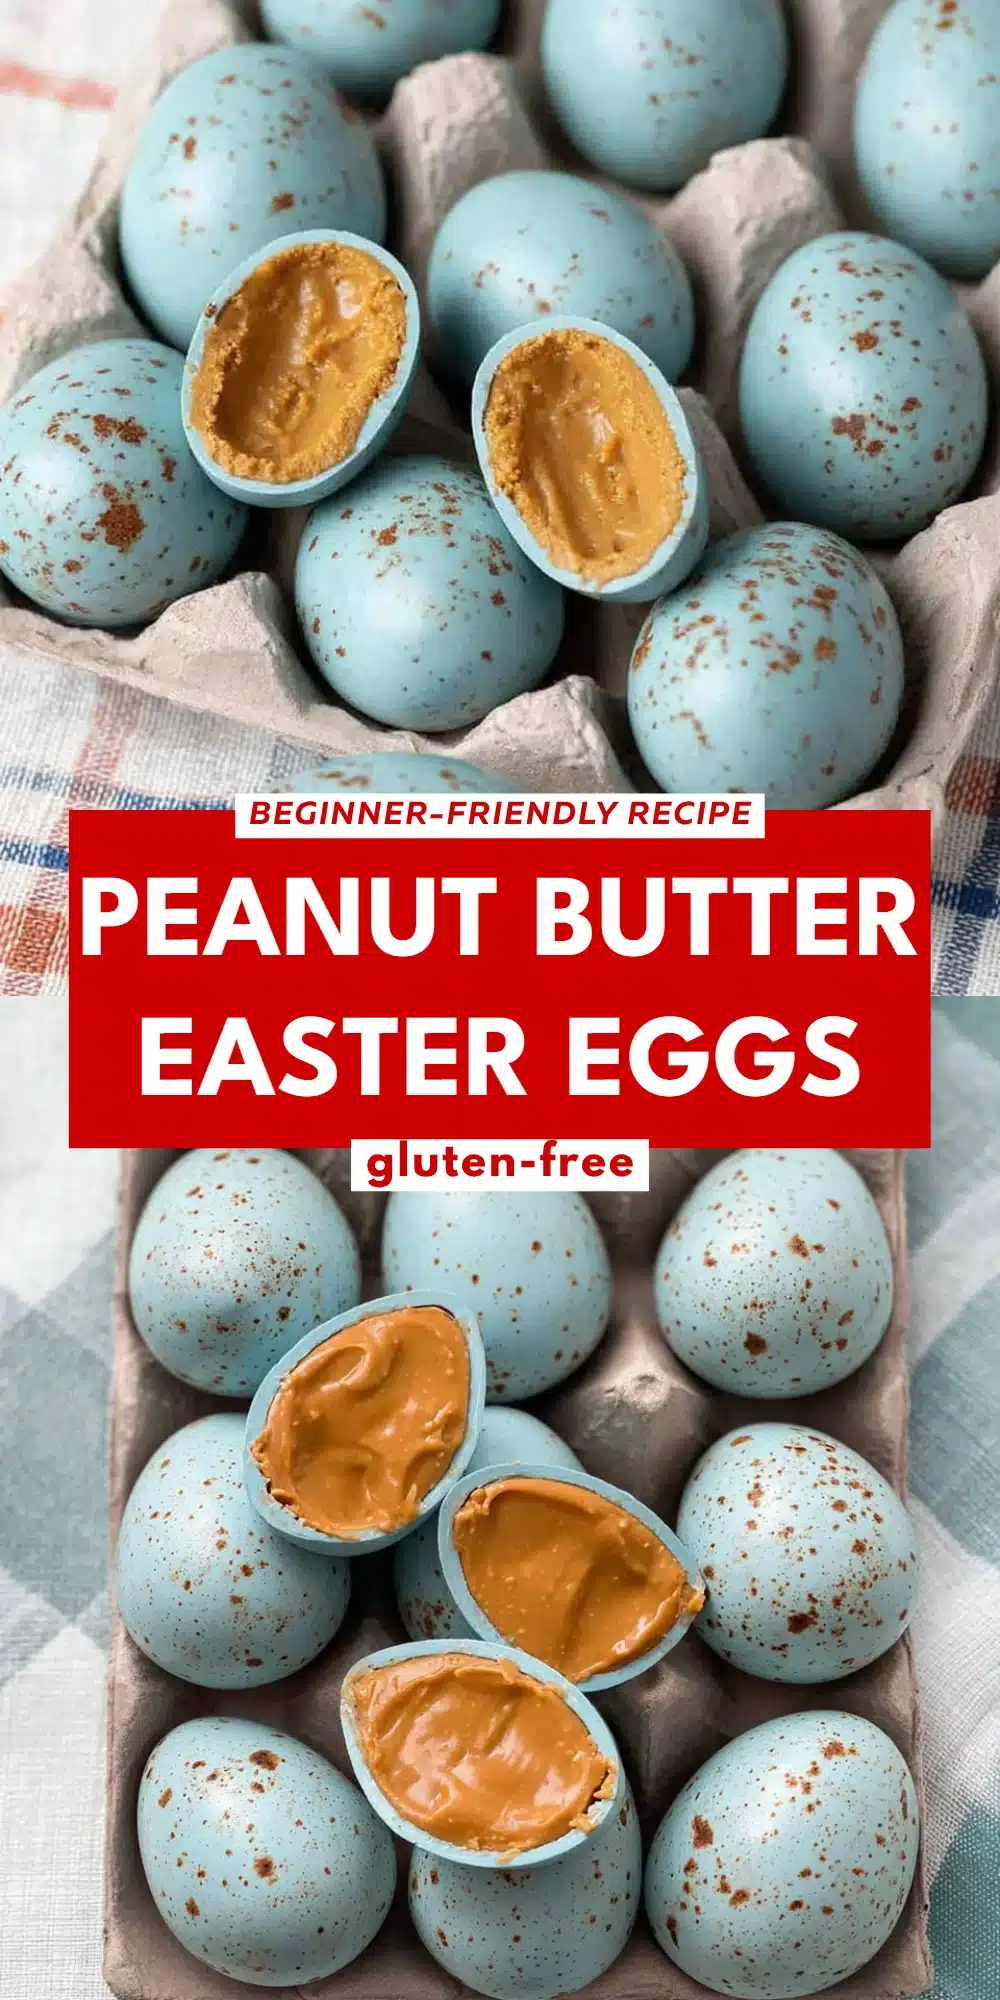
Peanut Butter Easter Eggs
This post may contain affiliate links
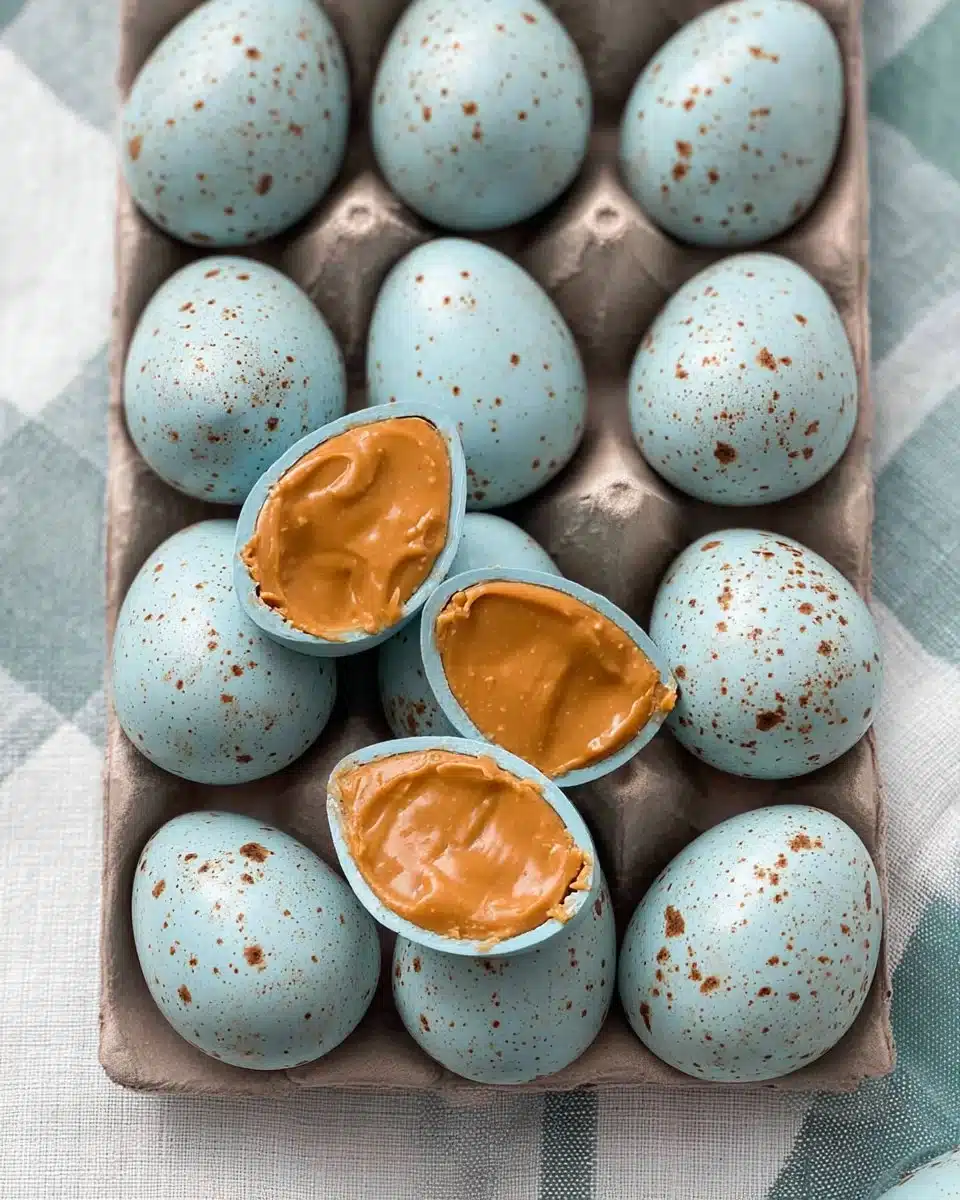
I often find myself reminiscing about the joy of Easter egg hunts as a child, my heart racing with excitement as I discovered treats hidden among the flowers and grass. Today, I can carry that spirit into my kitchen with a delightful twist: Peanut Butter Easter Eggs. These creamy, sweet, and decadent delights capture the nostalgic feelings of childhood while being gluten-free and perfect for sharing.
What makes these Peanut Butter Easter Eggs truly special is the combination of natural ingredients that come together to create an experience that is both comforting and familiar. With the embrace of peanut butter, maple syrup, and a touch of sweetness, it’s no wonder why these have become a staple in my home during the holiday season.
Exploring the Roots of Peanut Butter Easter Eggs
Peanut Butter Easter Eggs are a cherished treat during Easter, a time that celebrates rebirth and joy. The concept of filling chocolate shells with sweet nut butter dates back to early American traditions, where families made candies and treats to mark the arrival of spring. This gluten-free recipe combines the rich flavor of peanut butter with wholesome ingredients, ensuring that everyone can partake in the sweetness without worrying about gluten.
By substituting traditional wheat-based ingredients with certified gluten-free options, these Peanut Butter Easter Eggs cater to a broad audience. This makes them safe for those with celiac disease, gluten intolerance, or anyone seeking a delicious, wheat-free treat.
Why You’ll Love This Peanut Butter Easter Eggs
- Flavor Explosion: The creaminess of the peanut butter combined with the sweetness of maple syrup creates a mouthwatering combination that your taste buds will crave.
- Convenient and Quick: These Peanut Butter Easter Eggs can be made in under an hour, from preparation to chilling, allowing for quick delight on even the busiest days.
- Gluten-Free Enjoyment: With focused attention on ingredient safety, you can enjoy these eggs without concern for gluten, making them perfect for all to share.
- Family-Friendly Fun: Create lasting memories with your loved ones as you gather to make and decorate these delightful treats, encouraging creativity flavored with joy.
Who Will Enjoy This Peanut Butter Easter Eggs Most
- Individuals with celiac disease or gluten sensitivity
- Health-conscious individuals looking for guilt-free indulgence
- Families who want to celebrate the holidays with special, safe treats
- Bake enthusiasts seeking to explore gluten-free fantastical desserts
Perfect Moments to Enjoy Peanut Butter Easter Eggs
- Family Gatherings: An excellent addition to your holiday spread, these treats invite everyone to indulge together.
- Easter Celebrations: Celebrate the festival of renewal and joy with these themed treats that reflect the spirit of the season.
- Movie Nights: A perfect companion for cozy evenings at home with loved ones.
- Meal Prep: Whip up a batch for delicious snacks throughout the week, keeping the sweet cravings at bay.
How to Make the Perfect Peanut Butter Easter Eggs
Creating these delicious Peanut Butter Easter Eggs in your kitchen is not as tricky as it sounds. With the right ingredients and a little bit of love, you can whip up these treats that are perfect for any occasion.
Ingredients
- 1 1/4 cup natural, runny peanut butter (no sugar added)
- 1/4 cup maple syrup
- 1/4 cup powdered sugar
- 1/3 cup almond flour
- 1/2 teaspoon vanilla extract
- Pinch of salt
- 8 ounces white chocolate melting wafers
- 2 teaspoons coconut oil
- 1/2 teaspoon blue spirulina
- 1/4 teaspoon matcha powder
- 1 teaspoon cocoa powder
- 1 tablespoon water
All ingredients should be checked for certification as gluten-free to ensure safety against hidden gluten.
Step-by-Step Instructions
-
Beat together the peanut butter, maple syrup, powdered sugar, almond flour, vanilla extract, and salt in a mixing bowl until well combined.
-
Portion the peanut butter filling into 2-tablespoon portions.
-
Roll each portion into a ball using your hands, then shape each ball into an oval (egg-shaped).
-
Place the shaped eggs on a parchment paper-lined baking sheet and freeze while you prepare the coating.
-
Whisk together the cocoa powder and water in a small bowl and set aside.
-
Add the white chocolate and coconut oil to a microwave-safe bowl. Microwave in 15-20 second intervals, stirring well between each interval, until fully melted.
-
Whisk in the spirulina and matcha (or food coloring) and adjust colors as desired.
-
Pour the melted mixture into a short drinking glass.
-
Stick a toothpick in the bottom of a semi-frozen egg, then dip it in the white chocolate.
-
Let the excess chocolate drip off. Once mostly hardened, remove the toothpick and return the egg to the parchment paper.
-
Dip a pastry brush into the cocoa powder/water mixture and flick the tip over the eggs to create speckles.
-
Refrigerate until the chocolate dries out (~10 minutes).
For People with Celiac Disease or Gluten Sensitivity
To ensure the utmost safety when making Peanut Butter Easter Eggs, always utilize dedicated gluten-free tools and surfaces. Check all packaging for hidden gluten, and opt for brands that explicitly label their ingredients as gluten-free. When preparing these delicious treats, be vigilant about cross-contamination to maintain a safe cooking environment.
Essential Gear for Peanut Butter Easter Eggs
- Mixing bowls
- Measuring cups and spoons
- Baking sheets lined with parchment paper
- Microwave-safe bowls
- Whisk and toothpicks
- A pastry brush
Utilize dedicated utensils for gluten-free recipes to avoid cross-contact with gluten-containing foods.
Pro Tips to Elevate Your Peanut Butter Easter Eggs
- Balance Moisture: Adjust almond flour or powdered sugar to maintain the right filling consistency, ensuring a perfectly shaped egg.
- Color Adjustment: Feel free to experiment with food coloring to craft vibrant decorations for your Easter creations.
- Texture Harmony: Ensure your peanut butter is smooth to avoid lumps that may affect the filling consistency.
How to Store & Reheat Peanut Butter Easter Eggs
- Fridge: Keep the eggs in an airtight container for up to two weeks.
- Freezer: Store in a single layer in an airtight container for up to three months.
- Reheating: While they are best enjoyed chilled, you can let them sit at room temperature for a few minutes before indulging.
Common Mistakes to Avoid
- Skipping Ingredient Checks: Always verify that your ingredients are gluten-free and from a safe source to avoid cross-contamination.
- Overmixing: Be careful not to overmix the filling, which can lead to a grainy texture.
- Improper Cooling Time: Allow the eggs to freeze properly before dipping to create a cleaner coating without melting.
FAQs About Peanut Butter Easter Eggs
Can I use chocolate instead of white chocolate?
Yes, you can alter the recipe by substituting white chocolate with gluten-free chocolate for a different flavor profile.
Are Peanut Butter Easter Eggs gluten-free?
Yes, as long as you choose certified gluten-free ingredients, these treats are entirely safe for those with gluten sensitivities.
Can I make these Vegan?
It depends. You may replace the honey with agave syrup and ensure your chocolate is dairy-free to create a vegan version.
How long can I store Peanut Butter Easter Eggs?
Yes, they can be stored in the fridge for up to two weeks or frozen for up to three months.
Wrapping Up: The Joy of Peanut Butter Easter Eggs
There’s something inherently joyous about making Peanut Butter Easter Eggs—a blend of nostalgia, creativity, and flavor that both children and adults adore. With these gluten-free treats, you can indulge your palate while keeping health at the forefront. So grab your loved ones, gather around the kitchen, and create these delicious little nuggets of happiness; they deserve a place at your table!
Peanut Butter Easter Eggs

A delightful gluten-free treat that captures the nostalgic joy of Easter with creamy peanut butter and sweet flavors.
- Prep Time: 15 minutes
- Cook Time: 30 minutes
- Total Time: 45 minutes
- Yield: 12 servings 1x
- Category: Dessert
- Method: Chilling
- Cuisine: American
- Diet: Gluten-Free
Ingredients
- 1 1/4 cup natural, runny peanut butter (no sugar added)
- 1/4 cup maple syrup
- 1/4 cup powdered sugar
- 1/3 cup almond flour
- 1/2 teaspoon vanilla extract
- Pinch of salt
- 8 ounces white chocolate melting wafers
- 2 teaspoons coconut oil
- 1/2 teaspoon blue spirulina
- 1/4 teaspoon matcha powder
- 1 teaspoon cocoa powder
- 1 tablespoon water
Instructions
- Beat together the peanut butter, maple syrup, powdered sugar, almond flour, vanilla extract, and salt in a mixing bowl until well combined.
- Portion the peanut butter filling into 2-tablespoon portions.
- Roll each portion into a ball using your hands, then shape each ball into an oval (egg-shaped).
- Place the shaped eggs on a parchment paper-lined baking sheet and freeze while you prepare the coating.
- Whisk together the cocoa powder and water in a small bowl and set aside.
- Add the white chocolate and coconut oil to a microwave-safe bowl. Microwave in 15-20 second intervals, stirring well between each interval, until fully melted.
- Whisk in the spirulina and matcha (or food coloring) and adjust colors as desired.
- Pour the melted mixture into a short drinking glass.
- Stick a toothpick in the bottom of a semi-frozen egg, then dip it in the white chocolate.
- Let the excess chocolate drip off. Once mostly hardened, remove the toothpick and return the egg to the parchment paper.
- Dip a pastry brush into the cocoa powder/water mixture and flick the tip over the eggs to create speckles.
- Refrigerate until the chocolate dries out (~10 minutes).

Notes
Utilize dedicated gluten-free utensils and check all ingredients for certification to ensure safety.
Nutrition
- Serving Size: 1 egg
- Calories: 200
- Sugar: 10g
- Sodium: 50mg
- Fat: 12g
- Saturated Fat: 6g
- Unsaturated Fat: 6g
- Trans Fat: 0g
- Carbohydrates: 18g
- Fiber: 2g
- Protein: 5g
- Cholesterol: 0mg