Gluten Free Japanese Milk Bread Recipe
This post may contain affiliate links
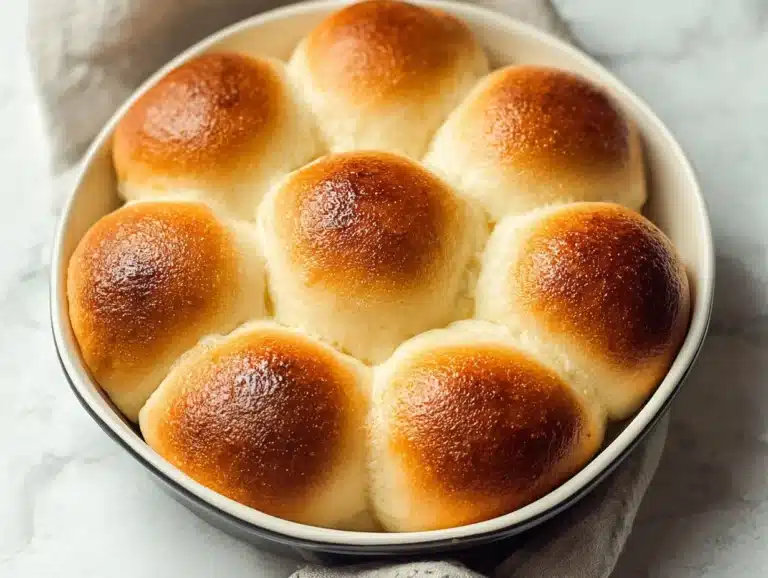
When I first discovered the joys of baking with gluten-free ingredients, I never imagined I would soon be seduced by the delightful aroma of freshly baked Japanese milk bread wafting through my kitchen. Soft, fluffy, and slightly sweet, this bread embodies warmth and comfort, reminding me of my travels in Japan. The Gluten Free Japanese Milk Bread Recipe quickly became a cherished staple in my life.
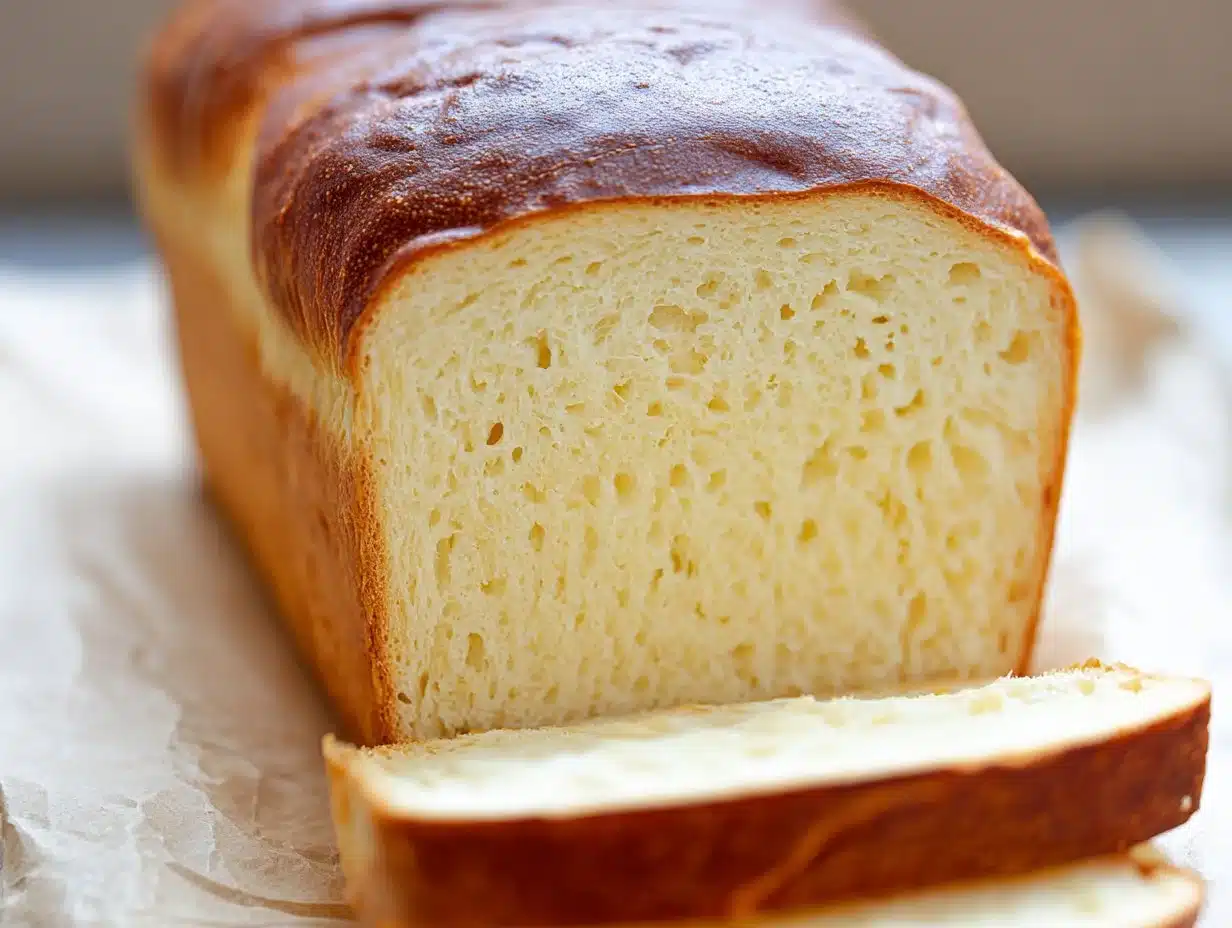
There’s something magical about breaking into a loaf of this bread, the crust golden and tender, revealing a pillowy interior. Whether enjoyed on its own or paired with a generous spread of butter and a drizzle of honey, this Gluten Free Japanese Milk Bread Recipe is one I cannot wait to share with you.
What is Gluten Free Japanese Milk Bread Recipe?
Originating in Japan, this milk bread is known for its incredibly soft texture and subtly sweet flavor. Traditional milk bread is made with a unique method known as tangzhong, or water roux, which adds moisture and extends the bread’s shelf life.
The Gluten Free Japanese Milk Bread Recipe I’ll be sharing incorporates a blend of gluten-free flours, allowing those of us with gluten sensitivities to indulge in this beloved treat without worry. It’s bread lover’s paradise, full of comforting flavors and rich cultural insights.
Why You’ll Love This Gluten Free Japanese Milk Bread Recipe
- Flavorful Delight: The subtle sweetness of the bread pairs perfectly with savory or sweet toppings.
- Health-Conscious Option: Made with wholesome gluten-free ingredients that provide a flavorful alternative for those avoiding gluten.
- Family-Friendly: This bread is perfect for dippable snacks, breakfast, or lunch boxes, making it a hit with kids and adults alike.
- Versatile Usage: Enjoy it warm or toasted; this bread complements a variety of meals and occasions.
Who It’s For
- Busy Families: Easy to make and perfect for quick breakfasts or snacks.
- Health-Conscious Cooks: Offers a delicious gluten-free option for those with dietary restrictions.
- Beginners: Written in an approachable style, this recipe is ideal for novice bakers.
- Foodies: Anyone looking to expand their repertoire with comforting, globally inspired recipes.
When to Cook It
- Cozy Weeknight Dinners: Serve this bread warm alongside your family meals.
- Gatherings and Celebrations: An impressive addition to any table for special occasions.
- Weekend Breakfasts: Delicious when paired with eggs and jam for a leisurely brunch.
- Holidays: Perfect for festive meals, adding a cultural twist to your celebrations.
How to Make the Perfect Gluten Free Japanese Milk Bread Recipe
Ingredients
- 3 tablespoons all purpose gluten free flour blend ((I used Better Batter; click thru for full info on appropriate blends))
- 1/2 cup water
- 3 cups all purpose gluten free flour blend
- 3 teaspoons xanthan gum (omit if your blend already contains it)
- 1/4 teaspoon cream of tartar
- 1/4 cup granulated sugar
- 2 1/2 teaspoons instant yeast ((also called rapid-rise or breadmaker yeast))
- 1/2 teaspoon kosher salt
- 1 teaspoon apple cider vinegar
- 1 egg (at room temperature)
- 1 1/4 cups warm milk ((about 100°F))
- 4 tablespoons unsalted butter (melted and cooled)
- Water roux (at room temperature)
- Melted butter (for brushing (optional))
Step-by-Step Instructions
1. Make the water roux
In a small saucepan, whisk together all roux ingredients until smooth.
Cook over medium-high heat, whisking constantly, until it thickens enough that the whisk leaves clear lines in the mixture.
Remove from the heat right away and let it cool to warm room temperature.
You can prepare the roux ahead of time and refrigerate it in an airtight container. Just bring it back to room temperature before using.
2. Prepare the dough
Grease and line a 9×5-inch loaf pan; set aside.
In the bowl of a stand mixer fitted with the paddle attachment, add 3 cups flour, xanthan gum, cream of tartar, sugar, and yeast. Whisk these dry ingredients together by hand.
Add the salt and whisk again.
Pour in the vinegar, egg, milk, butter, and cooled water roux. Mix on low until combined, then increase to high speed and beat for about 3 minutes. The dough will look shaggy and feel tacky.
3. Shape the dough
Lightly dust your work surface with flour and turn the dough out.
Divide the dough into 3 equal portions (about 350 g each).
For each portion, gently pat it into a disk about ¾-inch thick, then fold it loosely in half from short end to short end.
Place the folded pieces in the loaf pan, lined up snugly from end to end with the folded (rounded) sides facing upward.
Lightly mist the dough with warm water, cover loosely with plastic wrap, and let it rise in a warm, draft-free place until it reaches about 150% of its original size.
4. Bake the bread
While the dough rises, preheat the oven to 350°F (175°C).
Once risen, remove the plastic wrap, brush the top with melted butter if using, and bake for 45 minutes.
Carefully remove the loaf from the pan and place it on a rimmed baking sheet. Return it to the oven.
Bake for about 10 minutes more, or until the loaf sounds hollow when tapped and reaches 190°F (88°C) internally.
Transfer to a wire rack and let the bread cool completely before slicing.
For People with Diabetes: Sugar Substitutes
If you’re looking to create a lower-sugar version of this delightful recipe, consider using stevia, monk fruit, or allulose as suitable substitutes.
Avoid honey and maple syrup, as these are high in carbohydrates and could affect blood sugar levels.

Tools You’ll Need
- Mixing bowls
- Measuring cups and spoons
- Whisk
- Baking pan (9×5 inches)
- Kitchen towel or plastic wrap
- Cooling rack
Top Tips from Well-Known Chefs
- Measure Accurately: Use a kitchen scale for precise measurements, especially with gluten-free flours, to ensure your bread turns out perfectly every time.
- Knead Gently: Since gluten-free doughs behave differently, handle with care—over-kneading can lead to a denser loaf.
- Temperature Matters: Make sure your milk is warm but not hot—about 100°F—to activate the yeast successfully.
- Allow for Resting: Let the dough rest to help with texture; this is key to achieving that fluffiness we all crave in milk bread.
Storing and Reheating Tips
- Fridge: Store leftovers in an airtight container for up to four days.
- Freezer: Wrap bread tightly in plastic wrap and foil, then freeze for up to three months.
- Reheating: Warm slices in the oven for a few minutes or toast them for a crispy exterior.
Common Mistakes to Avoid
- Skipping the Water Roux: This crucial step is key to achieving the signature softness of Japanese milk bread.
- Not Allowing Dough to Rise: Patience is essential; under-risen dough will not yield the fluffiness you desire.
- Using Cold Ingredients: Ensure that your egg and milk are at room temperature for optimal mixing.
- Overbaking: Check for doneness a few minutes before the recommended time; overbaking can lead to a dry loaf.
FAQs About Gluten Free Japanese Milk Bread Recipe
Can I substitute the all-purpose gluten-free flour blend with another type?
It depends on the specific blend; ensure it has a good balance of starch and protein.
Does this bread freeze well?
Yes, it freezes beautifully, making it a great option for meal prepping.
Is this recipe suitable for vegans?
No, this recipe contains egg and dairy; however, you can explore vegan substitutes.
Can I make this bread without xanthan gum?
Yes, if your gluten-free flour blend already contains it, you can omit the xanthan gum.
How long does this bread stay fresh?
When stored properly, this bread can last up to four days at room temperature.

Conclusion: Final Thoughts on Gluten Free Japanese Milk Bread Recipe
Baking the Gluten Free Japanese Milk Bread Recipe has brought so much joy into my kitchen. Each fluffy slice is a reminder that gluten-free doesn’t mean sacrificing flavor or texture. I invite you to share your baking experiences or any family twists on this recipe in the comments below; let’s keep the conversation going! Happy baking!
PrintGluten Free Japanese Milk Bread

A soft, fluffy, and slightly sweet Japanese milk bread made with gluten-free ingredients. Perfect for a variety of meals or snacks.
- Prep Time: 15 minutes
- Cook Time: 30 minutes
- Total Time: 45 minutes
- Yield: 10 servings 1x
- Category: Breads
- Method: Baking
- Cuisine: Japanese
- Diet: Gluten-Free
Ingredients
- 3 tablespoons all-purpose gluten free flour blend
- 1/2 cup water
- 3 cups all-purpose gluten free flour blend
- 3 teaspoons xanthan gum (omit if your blend already contains it)
- 1/4 teaspoon cream of tartar
- 1/4 cup granulated sugar
- 2 1/2 teaspoons instant yeast
- 1/2 teaspoon kosher salt
- 1 teaspoon apple cider vinegar
- 1 egg (at room temperature)
- 1 1/4 cups warm milk (about 100°F)
- 4 tablespoons unsalted butter (melted and cooled)
- Water roux (at room temperature)
- Melted butter (for brushing, optional)
Instructions
-
1. Make the water roux
-
In a small saucepan, whisk together all roux ingredients until smooth.
-
Cook over medium-high heat, whisking constantly, until it thickens enough that the whisk leaves clear lines in the mixture.
-
Remove from the heat right away and let it cool to warm room temperature.
-
You can prepare the roux ahead of time and refrigerate it in an airtight container. Just bring it back to room temperature before using.
2. Prepare the dough
-
Grease and line a 9×5-inch loaf pan; set aside.
-
In the bowl of a stand mixer fitted with the paddle attachment, add 3 cups flour, xanthan gum, cream of tartar, sugar, and yeast. Whisk these dry ingredients together by hand.
-
Add the salt and whisk again.
-
Pour in the vinegar, egg, milk, butter, and cooled water roux. Mix on low until combined, then increase to high speed and beat for about 3 minutes. The dough will look shaggy and feel tacky.
3. Shape the dough
-
Lightly dust your work surface with flour and turn the dough out.
-
Divide the dough into 3 equal portions (about 350 g each).
-
For each portion, gently pat it into a disk about ¾-inch thick, then fold it loosely in half from short end to short end.
-
Place the folded pieces in the loaf pan, lined up snugly from end to end with the folded (rounded) sides facing upward.
-
Lightly mist the dough with warm water, cover loosely with plastic wrap, and let it rise in a warm, draft-free place until it reaches about 150% of its original size.
4. Bake the bread
-
While the dough rises, preheat the oven to 350°F (175°C).
-
Once risen, remove the plastic wrap, brush the top with melted butter if using, and bake for 45 minutes.
-
Carefully remove the loaf from the pan and place it on a rimmed baking sheet. Return it to the oven.
-
Bake for about 10 minutes more, or until the loaf sounds hollow when tapped and reaches 190°F (88°C) internally.
-
Transfer to a wire rack and let the bread cool completely before slicing.
-
Notes
For a lower-sugar version, consider using sugar substitutes like stevia, monk fruit, or allulose. This bread freezes beautifully; store properly to maintain freshness.
Nutrition
- Serving Size: 1 slice
- Calories: 200
- Sugar: 4g
- Sodium: 120mg
- Fat: 8g
- Saturated Fat: 3g
- Unsaturated Fat: 4g
- Trans Fat: 0g
- Carbohydrates: 30g
- Fiber: 2g
- Protein: 4g
- Cholesterol: 40mg