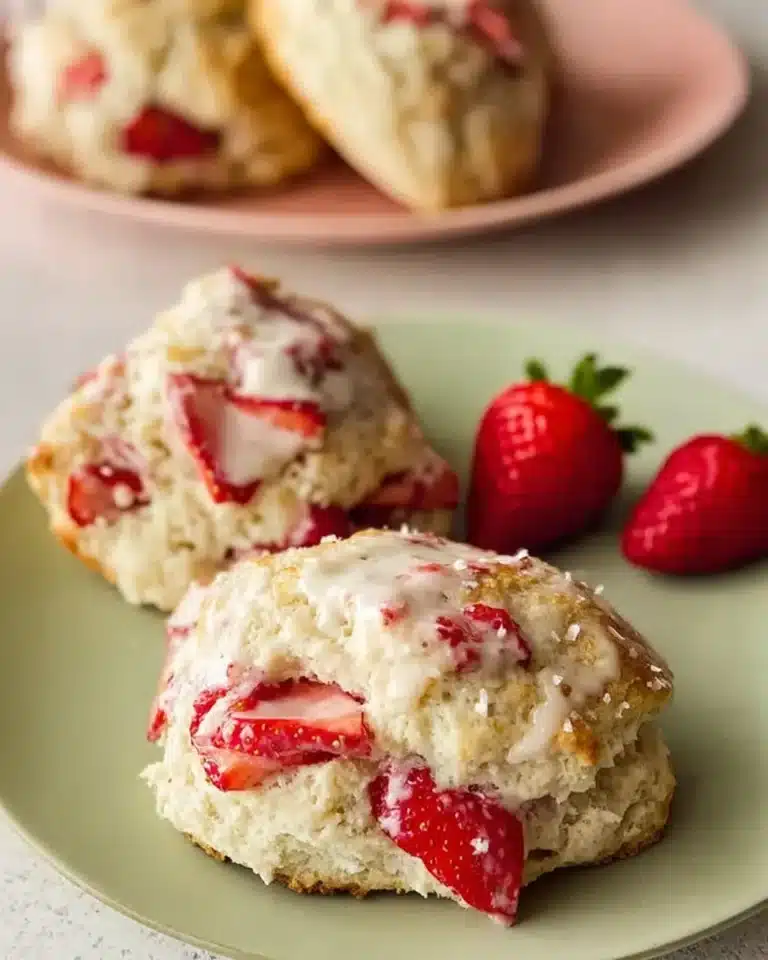
Gluten-Free Butterbeer Cheesecake Jars

This post may contain affiliate links
As a lifelong fan of the Harry Potter series, I’ve always been enchanted by the magical world J.K. Rowling created. One of my fondest memories is visiting The Wizarding World of Harry Potter, where I first tasted the iconic butterbeer. The sweet, creamy flavor lingered on my palate, and I knew I had to recreate that magic in my own kitchen. That’s how I stumbled upon the idea of making Gluten-Free Butterbeer Cheesecake Jars. These delightful desserts are not only a nod to the beloved series but also a treat that everyone can enjoy, regardless of dietary restrictions.
Imagine opening a jar to reveal layers of creamy cheesecake, a buttery graham cracker crust, and a drizzle of rich butterscotch sauce. The first bite is a symphony of flavors: the smoothness of the cream cheese, the sweetness of the butterscotch, and the crunch of the crust all come together in perfect harmony. Each spoonful transports you to a cozy corner of the Hogwarts library, where the aroma of freshly baked treats fills the air. These Gluten-Free Butterbeer Cheesecake Jars are not just desserts; they are a celebration of friendship, magic, and the joy of sharing delicious food with loved ones.
What is Gluten-Free Butterbeer Cheesecake Jars?
The Gluten-Free Butterbeer Cheesecake Jars are a delightful fusion of two beloved concepts: the creamy indulgence of cheesecake and the whimsical charm of the Harry Potter universe. Inspired by the famous butterbeer served at the Wizarding World, these jars encapsulate the essence of magical desserts that fans of all ages can enjoy. The idea of combining the rich flavors of butterscotch and cream cheese into a no-bake cheesecake was born from my desire to recreate the enchanting experience of sipping butterbeer while exploring the cobblestone streets of Hogsmeade.
In the Harry Potter series, butterbeer is more than just a drink; it symbolizes warmth, friendship, and the joy of gathering with loved ones. It’s often enjoyed during cozy moments, whether it’s a chilly evening at the Three Broomsticks or a festive celebration at Hogwarts. This cultural significance inspired me to craft a dessert that not only pays homage to this iconic beverage but also brings people together around the table. Each jar of cheesecake is a mini celebration, perfect for Harry Potter-themed treats at birthday parties, movie marathons, or even casual family dinners.
As you dig into these jars, you’ll find that they embody the spirit of the series—full of wonder and delight. The layers of creamy cheesecake, buttery crust, and sweet butterscotch sauce create a symphony of flavors that will transport you straight to the magical world. So, whether you’re a die-hard fan or simply someone who loves a good dessert, these Gluten-Free Butterbeer Cheesecake Jars are sure to cast a spell on your taste buds!
Why You’ll Love This Gluten-Free Butterbeer Cheesecake Jars
These Gluten-Free Butterbeer Cheesecake Jars are not just a treat; they are a delightful experience that brings joy to any occasion. Here’s why you’ll fall in love with them:
- Convenience of no-bake preparation: With no baking required, these jars are incredibly easy to whip up, making them perfect for busy weeknights or last-minute gatherings.
- Rich, creamy flavor profile: The combination of cream cheese and butterscotch creates a luscious dessert that appeals to both kids and adults alike, ensuring everyone leaves with a smile.
- Health-conscious option: Made with gluten-free ingredients, these jars cater to those with dietary restrictions without compromising on taste.
- Perfect for themed parties: Whether it’s a Harry Potter marathon or a birthday celebration, these jars add a magical touch to any event, making them a hit among guests.
Who It’s For
These enchanting jars are ideal for Harry Potter fans, families looking to create memorable desserts, and anyone who simply loves a good cheesecake. Whether you’re hosting a themed party or just want to indulge in a sweet treat, these jars are sure to please.
When to Cook It
Consider making these Gluten-Free Butterbeer Cheesecake Jars for special occasions like Harry Potter marathons, birthdays, or casual gatherings with friends and family. They’re also a fantastic way to celebrate the magic of everyday moments!
How to Make the Perfect Gluten-Free Butterbeer Cheesecake Jars
Ingredients
To create these delightful Gluten-Free Butterbeer Cheesecake Jars, you’ll need a handful of simple yet magical ingredients. Each one plays a crucial role in crafting the creamy, dreamy texture and flavor that will transport you straight to the wizarding world.
- 1 cup gluten-free graham cracker crumbs: This forms the base of our cheesecake, providing that essential crunch. If you can’t find gluten-free graham crackers, you can use crushed gluten-free cookies or even almond flour for a different twist.
- 1/4 cup unsalted butter, melted: It binds the crumbs together, creating a rich crust. For a dairy-free option, coconut oil works beautifully.
- 2 cups cream cheese, softened: The star of the show, giving our cheesecake its creamy texture. If you’re looking for a dairy-free alternative, consider using a vegan cream cheese.
- 1 cup powdered sugar: For sweetness, balancing the richness of the cream cheese. You can substitute with powdered erythritol for a low-sugar option.
- 1/2 cup butterscotch sauce: This adds that signature butterbeer flavor, making it truly special. You can make your own or find a gluten-free version at the store.
- 1 teaspoon vanilla extract: Enhances the overall flavor profile, adding warmth and depth.
- 1 cup whipped cream: Lightens the mixture, making it airy and delightful. For a dairy-free version, use coconut whipped cream.
- Extra butterscotch sauce for drizzling: Because who doesn’t love a little extra sweetness on top?
Step-by-Step Instructions
Now, let’s dive into the process of making these enchanting jars. Follow these steps, and you’ll have a dessert that’s not only delicious but also a feast for the eyes.
- Preheat your oven to 350°F (175°C). While we won’t be baking the cheesecake, this step is essential if you decide to make a baked version later!
- In a bowl, mix the gluten-free graham cracker crumbs with melted butter until combined. The mixture should resemble wet sand, perfect for forming a crust.
- Press the mixture into the bottom of small jars to form the crust. Use the back of a spoon to pack it tightly, ensuring a solid base.
- In a separate bowl, beat the cream cheese until smooth. This is where the magic begins; it should be creamy and free of lumps.
- Add the powdered sugar, butterscotch sauce, and vanilla extract to the cream cheese and mix until well combined. The aroma will be heavenly!
- Fold in the whipped cream gently until fully incorporated. This step is crucial for achieving that light, airy texture.
- Layer the cheesecake mixture over the crust in the jars. Don’t be shy; fill them generously!
- Chill the jars in the refrigerator for at least 4 hours or until set. Patience is key here; the flavors will meld beautifully.
- Before serving, drizzle extra butterscotch sauce on top. This final touch adds a delightful sweetness and makes them look irresistible.
For People with Diabetes: Sugar Substitutes
If you’re looking to make these Gluten-Free Butterbeer Cheesecake Jars more diabetes-friendly, consider using sugar substitutes. Here are a few options:
- Stevia: A natural sweetener that can be used in place of powdered sugar. Just remember to adjust the quantity, as it is much sweeter.
- Erythritol: A sugar alcohol that has minimal calories and a low glycemic index, making it a great choice for baking.
- Monk fruit sweetener: Another natural option that provides sweetness without the calories.
It’s best to avoid using honey or maple syrup in this recipe, as they can significantly increase the sugar content and may not set properly in the cheesecake.
Discover my list of kitchen tools I always use.
Tools You’ll Need
To create your Gluten-Free Butterbeer Cheesecake Jars, having the right tools on hand will make the process smooth and enjoyable. Here’s a list of essential tools you’ll need, along with some easy alternatives:
- Mixing Bowls: A set of various sizes will help you mix your ingredients easily. If you don’t have mixing bowls, any large, deep dish can work.
- Electric Mixer: This is ideal for beating the cream cheese until smooth. If you don’t have one, a whisk can do the job, but it will require a bit more elbow grease!
- Measuring Cups and Spoons: Accurate measurements are key to achieving the perfect flavor. If you don’t have these, you can use any small cup or spoon as a makeshift measure, just keep the ratios consistent.
- Small Jars or Cups: These are perfect for layering your cheesecake. If you don’t have jars, consider using small glasses or even dessert bowls.
- Spatula: A silicone spatula is great for folding in the whipped cream and scraping down the sides of your mixing bowl. If you don’t have one, a wooden spoon can work in a pinch.
- Refrigerator: Essential for chilling your jars until set. If you’re short on space, consider using a cooler with ice packs to keep them chilled.
Having these tools ready will ensure that your baking experience is as magical as the Gluten-Free Butterbeer Cheesecake Jars themselves!
Tips from Well-Known Chefs
Creating the perfect Gluten-Free Butterbeer Cheesecake Jars is an art, and who better to turn to for inspiration than renowned chefs who have mastered the craft of cheesecake? Here are some chef-approved hacks that will elevate your dessert game and ensure a delightful experience for you and your guests.
- Use Room Temperature Ingredients: Chef Ina Garten emphasizes the importance of using room temperature cream cheese. This ensures a smooth and creamy texture, preventing lumps in your cheesecake filling. Take your cream cheese out of the fridge at least an hour before you start mixing.
- Don’t Overmix: According to pastry chef Dominique Ansel, overmixing can incorporate too much air into your cheesecake, leading to cracks during chilling. Mix just until combined, especially when folding in the whipped cream, to maintain that light, airy texture.
- Chill Thoroughly: Chef David Lebovitz suggests that chilling your cheesecake jars for a longer period, ideally overnight, allows the flavors to meld beautifully. This patience pays off, resulting in a richer taste and firmer texture.
- Experiment with Flavors: Renowned chef and author Alice Medrich encourages creativity in the kitchen. Feel free to add spices like cinnamon or nutmeg to your butterscotch sauce for a unique twist. You can also try infusing the whipped cream with flavors like vanilla bean or almond extract for added depth.
- Presentation Matters: Chef Thomas Keller believes that we eat with our eyes first. Consider garnishing your jars with a sprinkle of sea salt or a dollop of whipped cream topped with a drizzle of butterscotch sauce. This not only enhances the visual appeal but also adds an extra layer of flavor.
These tips from culinary experts will help you create Gluten-Free Butterbeer Cheesecake Jars that are not only delicious but also visually stunning. Embrace the magic of baking and let your creativity shine as you whip up this enchanting dessert!
Delicious Variations to Customize Your Dessert
One of the best things about Gluten-Free Butterbeer Cheesecake Jars is their versatility. You can easily customize them to suit your taste preferences or dietary needs. Here are some delightful variations to consider:
Flavor Modifications
- Spiced Butterscotch: Add a pinch of cinnamon or nutmeg to the butterscotch sauce for a warm, spiced flavor that complements the creamy cheesecake beautifully.
- Chocolate Drizzle: For a richer dessert, drizzle melted chocolate over the top of the cheesecake before serving. Dark chocolate pairs wonderfully with the sweetness of butterscotch.
- Caramel Swirl: Incorporate a swirl of caramel sauce into the cheesecake mixture before layering it in the jars. This adds an extra layer of sweetness and a delightful texture.
- Fruit Toppings: Top your jars with fresh berries or sliced bananas for a refreshing twist. The tartness of the fruit balances the sweetness of the cheesecake perfectly.
- Nutty Crunch: Add crushed nuts, such as pecans or walnuts, to the crust for an added crunch and nutty flavor. This variation adds a delightful texture contrast to the creamy filling.
Dietary Modifications
- Dairy-Free Option: Substitute the cream cheese with a dairy-free cream cheese alternative and use coconut whipped cream instead of regular whipped cream. This way, you can enjoy the same creamy texture without the dairy.
- Vegan Version: For a completely vegan dessert, use a plant-based cream cheese, coconut cream for the whipped topping, and a vegan butterscotch sauce. You can make your own by combining coconut milk, brown sugar, and a bit of cornstarch.
- Low-Sugar Option: Replace the powdered sugar with a sugar substitute like erythritol or stevia to create a low-sugar version of these jars. Just be sure to adjust the quantities according to the sweetness level of the substitute.
- Gluten-Free Crust Alternatives: If you want to switch things up, try using crushed gluten-free cookies like Oreos or almond flour mixed with coconut oil for a different flavor profile.
These variations allow you to make the Gluten-Free Butterbeer Cheesecake Jars your own, ensuring that everyone at your table can enjoy a magical dessert tailored to their tastes and dietary needs. So, get creative and have fun experimenting with flavors and ingredients!
Top Tips for Perfecting Your Gluten-Free Butterbeer Cheesecake Jars
Creating the perfect Gluten-Free Butterbeer Cheesecake Jars is all about attention to detail and a sprinkle of magic. Here are some expert techniques and cultural secrets that will elevate your dessert to new heights:
Achieving the Perfect Crust
- Use Fresh Ingredients: Ensure your gluten-free graham crackers are fresh for the best flavor. Stale crackers can lead to a less-than-ideal crust texture.
- Properly Measure Your Crumbs: When measuring your graham cracker crumbs, make sure to pack them lightly into the measuring cup. This ensures you have enough crumbs to create a sturdy base without being too dense.
- Don’t Skip the Butter: The melted butter is crucial for binding the crumbs together. Make sure it’s fully incorporated into the crumbs for a cohesive crust that holds its shape.
- Press Firmly: When forming the crust in the jars, use the back of a spoon or a small glass to press the mixture down firmly. This will create a solid base that won’t crumble when you dig in.
Perfecting the Filling
- Room Temperature Cream Cheese: Always start with cream cheese that’s at room temperature. This helps achieve a smooth, lump-free filling. If you forget to take it out in advance, you can microwave it for about 10 seconds to soften it slightly.
- Fold, Don’t Stir: When incorporating the whipped cream into the cheesecake mixture, use a gentle folding motion. This preserves the airiness of the whipped cream, resulting in a light and fluffy filling.
- Chill for Flavor: Allow your jars to chill for at least 4 hours, but overnight is even better. This resting time allows the flavors to meld beautifully, enhancing the overall taste of your cheesecake.
Cultural Secrets from the Harry Potter Universe
To truly capture the essence of the Harry Potter world in your Gluten-Free Butterbeer Cheesecake Jars, consider these cultural touches:
- Garnish with a Touch of Magic: Just like the drinks served at the Three Broomsticks, consider adding a sprinkle of edible gold dust or a few chocolate-covered pretzels on top for a whimsical touch that mirrors the enchanting atmosphere of Hogsmeade.
- Storytelling Through Food: Share the story of butterbeer with your guests as they enjoy their jars. Discuss how it’s a beloved drink among Hogwarts students and how it symbolizes warmth and friendship, making the dessert experience even more special.
- Pair with Themed Drinks: Serve your cheesecake jars alongside a warm mug of homemade butterbeer or pumpkin juice to create a complete Harry Potter-inspired feast that transports everyone to the wizarding world.
By following these tips and incorporating cultural elements from the Harry Potter universe, you’ll create Gluten-Free Butterbeer Cheesecake Jars that are not only delicious but also a magical experience for everyone at your table!
Storing and Reheating Tips
Once you’ve created your delightful Gluten-Free Butterbeer Cheesecake Jars, you might be wondering how to store them properly to maintain their magical flavor and texture. Here are some practical tips for storing and serving your jars:
Storing Your Cheesecake Jars
- Refrigeration: Store your jars in the refrigerator if you plan to enjoy them within a few days. Make sure to cover them with a lid or plastic wrap to prevent any odors from the fridge from affecting the flavor.
- Freezing: If you want to keep your jars for a longer period, you can freeze them! Just ensure they are tightly sealed to avoid freezer burn. They can be stored in the freezer for up to 2 months.
- Thawing: When you’re ready to enjoy your frozen jars, transfer them to the refrigerator and let them thaw overnight. This gradual thawing helps maintain the creamy texture of the cheesecake.
Serving After Storage
- Chill Before Serving: If your jars have been in the freezer, allow them to chill in the refrigerator for a few hours before serving. This will help restore their creamy consistency.
- Garnish Freshly: Before serving, consider adding a fresh drizzle of butterscotch sauce or a dollop of whipped cream. This not only enhances the visual appeal but also adds a fresh touch to the flavor.
- Texture Check: If the cheesecake appears a bit firmer after freezing, give it a gentle stir with a spoon to restore some creaminess before serving. This will help bring back that luscious texture you love.
By following these storing and reheating tips, you can ensure that your Gluten-Free Butterbeer Cheesecake Jars remain as delightful as the day you made them, ready to bring a touch of magic to any occasion!
Helpful Notes
As you embark on your journey to create these enchanting Gluten-Free Butterbeer Cheesecake Jars, here are some extra clarifications and tips to ensure your dessert turns out perfectly:
Ingredient Prep
- Softening Cream Cheese: To achieve that smooth, creamy texture, it’s essential to let your cream cheese sit at room temperature for at least an hour before mixing. If you’re short on time, you can cut it into small cubes to speed up the softening process.
- Graham Cracker Substitutes: If you can’t find gluten-free graham crackers, consider using crushed gluten-free cookies like Oreos or even almond flour mixed with a bit of melted butter. This will give you a unique flavor while still maintaining that essential crust.
- Whipped Cream Alternatives: For a lighter option, you can use coconut whipped cream instead of traditional whipped cream. This not only keeps the dessert dairy-free but also adds a subtle coconut flavor that pairs beautifully with butterscotch.
Potential Substitutions
- Butterscotch Sauce: If you’re looking for a homemade version, combine 1 cup of brown sugar, 1/2 cup of butter, and 1/2 cup of heavy cream in a saucepan. Cook over medium heat until the sugar dissolves and the mixture thickens. Just ensure that all ingredients are gluten-free!
- Powdered Sugar Alternatives: For a low-sugar option, you can substitute powdered sugar with powdered erythritol or stevia. Just remember to adjust the quantity, as these sweeteners can be sweeter than regular sugar.
- Flavor Enhancements: Feel free to experiment with flavorings! A splash of rum extract can add a delightful twist reminiscent of the butterbeer served at the Three Broomsticks. Just a teaspoon will do the trick!
Cultural References
As you enjoy your Gluten-Free Butterbeer Cheesecake Jars, take a moment to appreciate the cultural significance of butterbeer in the Harry Potter universe. This beloved drink is often associated with warmth, friendship, and the joy of gathering with loved ones. It’s a staple at the Wizarding World, enjoyed by students and wizards alike during festive occasions and cozy evenings.
Sharing these jars with friends and family can create a magical atmosphere reminiscent of the Great Hall feasts at Hogwarts. Imagine the laughter and stories shared over these delightful desserts, just like Harry, Hermione, and Ron would have enjoyed during their adventures. Each bite is not just a taste of sweetness; it’s a celebration of the bonds we share and the memories we create together.
Common Mistakes to Avoid
When crafting your Gluten-Free Butterbeer Cheesecake Jars, it’s essential to steer clear of common pitfalls that can affect the final outcome. Here are some mistakes to watch out for:
- Overmixing the Filling: Mixing the cheesecake filling too vigorously can incorporate too much air, leading to cracks in the cheesecake as it sets. Mix just until combined for a smooth, creamy texture.
- Not Chilling Long Enough: Patience is key! If you don’t chill the jars for at least 4 hours (or ideally overnight), the cheesecake won’t set properly, resulting in a runny consistency.
- Using Cold Ingredients: Starting with cold cream cheese can lead to lumps in your filling. Always ensure your cream cheese is at room temperature for a smooth blend.
- Skipping the Crust: The crust is an essential component of these jars. Don’t skip it or skimp on the crust ingredients, as it provides a delightful crunch that balances the creamy filling.
- Not Measuring Ingredients Accurately: Baking is a science, and precise measurements are crucial. Use proper measuring cups and spoons to ensure the right balance of flavors and textures.
- Forgetting to Taste: Always taste your filling before layering it in the jars. Adjust the sweetness or flavor as needed to ensure it’s just right for your palate.
FAQs About Gluten-Free Butterbeer Cheesecake Jars
As you embark on your journey to create these delightful Gluten-Free Butterbeer Cheesecake Jars, you may have some questions. Here are a few common concerns and their answers to help you along the way:
Can I make this dairy-free?
Absolutely! To make these jars dairy-free, simply substitute the cream cheese with a dairy-free cream cheese alternative and use coconut whipped cream instead of regular whipped cream. This way, you can enjoy the same creamy texture without the dairy.
How long do these cheesecake jars last in the fridge?
Your Gluten-Free Butterbeer Cheesecake Jars can be stored in the refrigerator for up to 5 days. Just make sure to cover them with a lid or plastic wrap to keep them fresh and prevent any odors from affecting the flavor.
Can I freeze the cheesecake jars?
Yes, you can freeze these jars! They can be stored in the freezer for up to 2 months. Just ensure they are tightly sealed to avoid freezer burn. When you’re ready to enjoy them, transfer the jars to the refrigerator to thaw overnight.
What can I use instead of butterscotch sauce?
If you don’t have butterscotch sauce on hand, you can use caramel sauce as a substitute. For a homemade version, combine brown sugar, butter, and cream in a saucepan until thickened. Just ensure that all ingredients are gluten-free!
Can I make these jars ahead of time?
Yes! In fact, these Gluten-Free Butterbeer Cheesecake Jars can be made a day in advance, making them a convenient option for parties or gatherings. Just remember to chill them for at least 4 hours before serving to allow the flavors to meld beautifully.
Conclusion: Final Thoughts on Gluten-Free Butterbeer Cheesecake Jars
As I reflect on the joy of creating these Gluten-Free Butterbeer Cheesecake Jars, I can’t help but feel a warm sense of nostalgia. Each jar is not just a dessert; it’s a vessel of memories, laughter, and the magic of sharing delicious food with loved ones. Whether you’re gathering around the table for a Harry Potter marathon or celebrating a special occasion, these jars bring a touch of enchantment to any moment.
There’s something truly special about watching friends and family take their first bite, their eyes lighting up with delight as they experience the creamy, dreamy flavors of butterscotch and cheesecake. It’s a reminder of the power of food to connect us, to create shared experiences, and to evoke the magic of storytelling that the Harry Potter series embodies.
I encourage you to try this recipe and let your creativity shine. Don’t hesitate to experiment with flavors and variations that reflect your personal taste. And most importantly, I’d love to hear about your experiences! Share your thoughts, tips, and any magical moments you create with these Gluten-Free Butterbeer Cheesecake Jars in the comments below. Let’s celebrate the joy of cooking and the magic of desserts together!
PrintGluten-Free Butterbeer Cheesecake Jars

Delicious and magical cheesecake jars inspired by the world of Harry Potter, perfect for any occasion.
- Prep Time: 20 minutes
- Cook Time: 0 minutes
- Total Time: 4 hours 20 minutes
- Yield: 4 jars 1x
- Category: Dessert
- Method: No-Bake
- Cuisine: American
- Diet: Gluten Free
Ingredients
- 1 cup gluten-free graham cracker crumbs
- 1/4 cup unsalted butter, melted
- 2 cups cream cheese, softened
- 1 cup powdered sugar
- 1/2 cup butterscotch sauce
- 1 teaspoon vanilla extract
- 1 cup whipped cream
- Extra butterscotch sauce for drizzling
Instructions
- Preheat your oven to 350°F (175°C).
- In a bowl, mix the gluten-free graham cracker crumbs with melted butter until combined.
- Press the mixture into the bottom of small jars to form the crust.
- In a separate bowl, beat the cream cheese until smooth.
- Add the powdered sugar, butterscotch sauce, and vanilla extract to the cream cheese and mix until well combined.
- Fold in the whipped cream gently until fully incorporated.
- Layer the cheesecake mixture over the crust in the jars.
- Chill the jars in the refrigerator for at least 4 hours or until set.
- Before serving, drizzle extra butterscotch sauce on top.
Discover my list of kitchen tools I always use.
Notes
- Make sure all ingredients are gluten-free.
- These jars can be made a day in advance for convenience.
- Feel free to add a sprinkle of sea salt on top for extra flavor.
Nutrition
- Serving Size: 1 jar
- Calories: 350
- Sugar: 25g
- Sodium: 200mg
- Fat: 20g
- Saturated Fat: 10g
- Unsaturated Fat: 5g
- Trans Fat: 0g
- Carbohydrates: 30g
- Fiber: 1g
- Protein: 4g
- Cholesterol: 60mg